Why the Motorcycle Road Test Matters More Than You Think
Earning your motorcycle endorsement is more than a bureaucratic hurdle — it's a formal validation that you can safely operate a two-wheeled vehicle in traffic. The DMV road test is designed to confirm that you understand basic vehicle controls, can execute low-speed maneuvers with precision, and demonstrate sound judgment at speed. Fail to respect the process and you risk not just the test, but your safety on public roads. Treat it seriously, prepare methodically, and you'll walk away with that coveted 'M' endorsement on your first try.
Step 1: Meet the Prerequisites Before You Show Up
Nothing derails a test day faster than missing paperwork or showing up with the wrong equipment. Before you schedule your road test, confirm you have the following in order:
- Learner's permit: Most states require you to hold a motorcycle learner's permit for a minimum period — typically 30 to 180 days — before taking the road test.
- Completed MSF course (where applicable): Many states waive the skills test entirely if you complete a Motorcycle Safety Foundation Basic RiderCourse. Check your state's DMV website to see if this applies to you.
- Valid identification and fees: Bring your current driver's license, permit, and the applicable testing fee. Requirements vary by state.
- A legal, registered motorcycle: The bike must have current registration, functioning lights, mirrors, horn, and tires in good condition. An examiner will check before you ride a single foot.
Step 2: Choose the Right Motorcycle for the Test
The motorcycle you ride to the test matters enormously. Examiners don't care how impressive your machine is — they care whether you can control it cleanly in a confined space. A heavy, high-powered bike is harder to maneuver at the slow speeds required for most skills tests. Beginners frequently perform better on lightweight, beginner-friendly motorcycles in the 300cc to 500cc range. If you're borrowing a friend's bike, make sure you've practiced on it extensively beforehand. Unfamiliar controls, a high seat height, or a touchy clutch can destroy an otherwise solid performance.
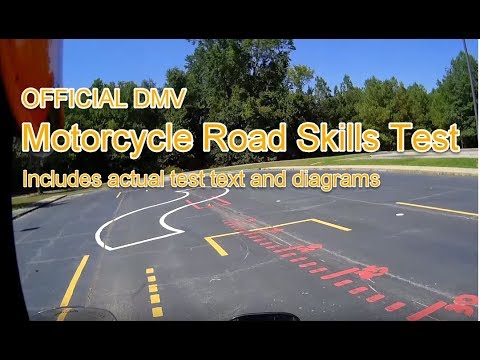
Step 3: Understand What the Road Test Actually Tests
The DMV motorcycle skills test is typically divided into two phases: a pre-ride inspection and a skills course evaluation. While formats vary by state, you can generally expect the following exercises:
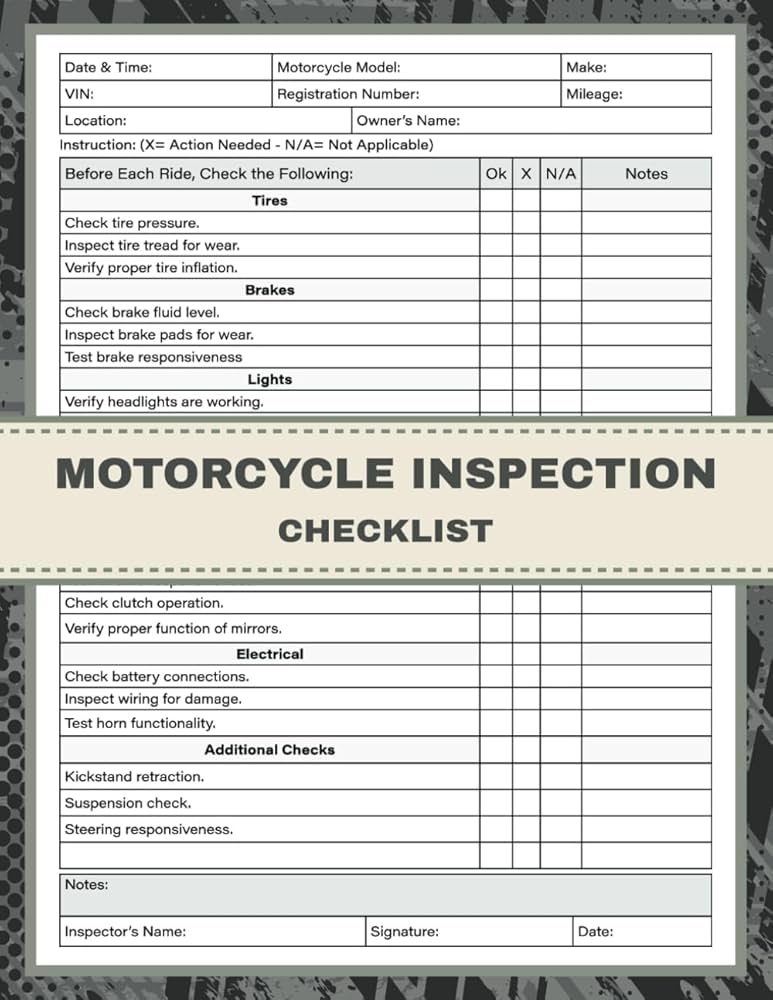
Pre-Ride Inspection (T-CLOCS)
Before you start the engine, the examiner will ask you to demonstrate a basic safety inspection. Use the T-CLOCS acronym as your checklist:
- T — Tires and Wheels: Check tire pressure, tread depth, and wheel condition.
- C — Controls: Inspect levers, pedals, cables, and throttle operation.
- L — Lights and Electrics: Test headlight, brake light, turn signals, and horn.
- O — Oil and Fluids: Check for leaks around the engine and check fluid levels visually.
- C — Chassis: Inspect the frame, suspension, and chain or belt drive.
- S — Stands: Confirm the kickstand and/or center stand retracts fully.
Walk the examiner through each step confidently and verbally. It demonstrates competence and earns you credit even before you touch the throttle.
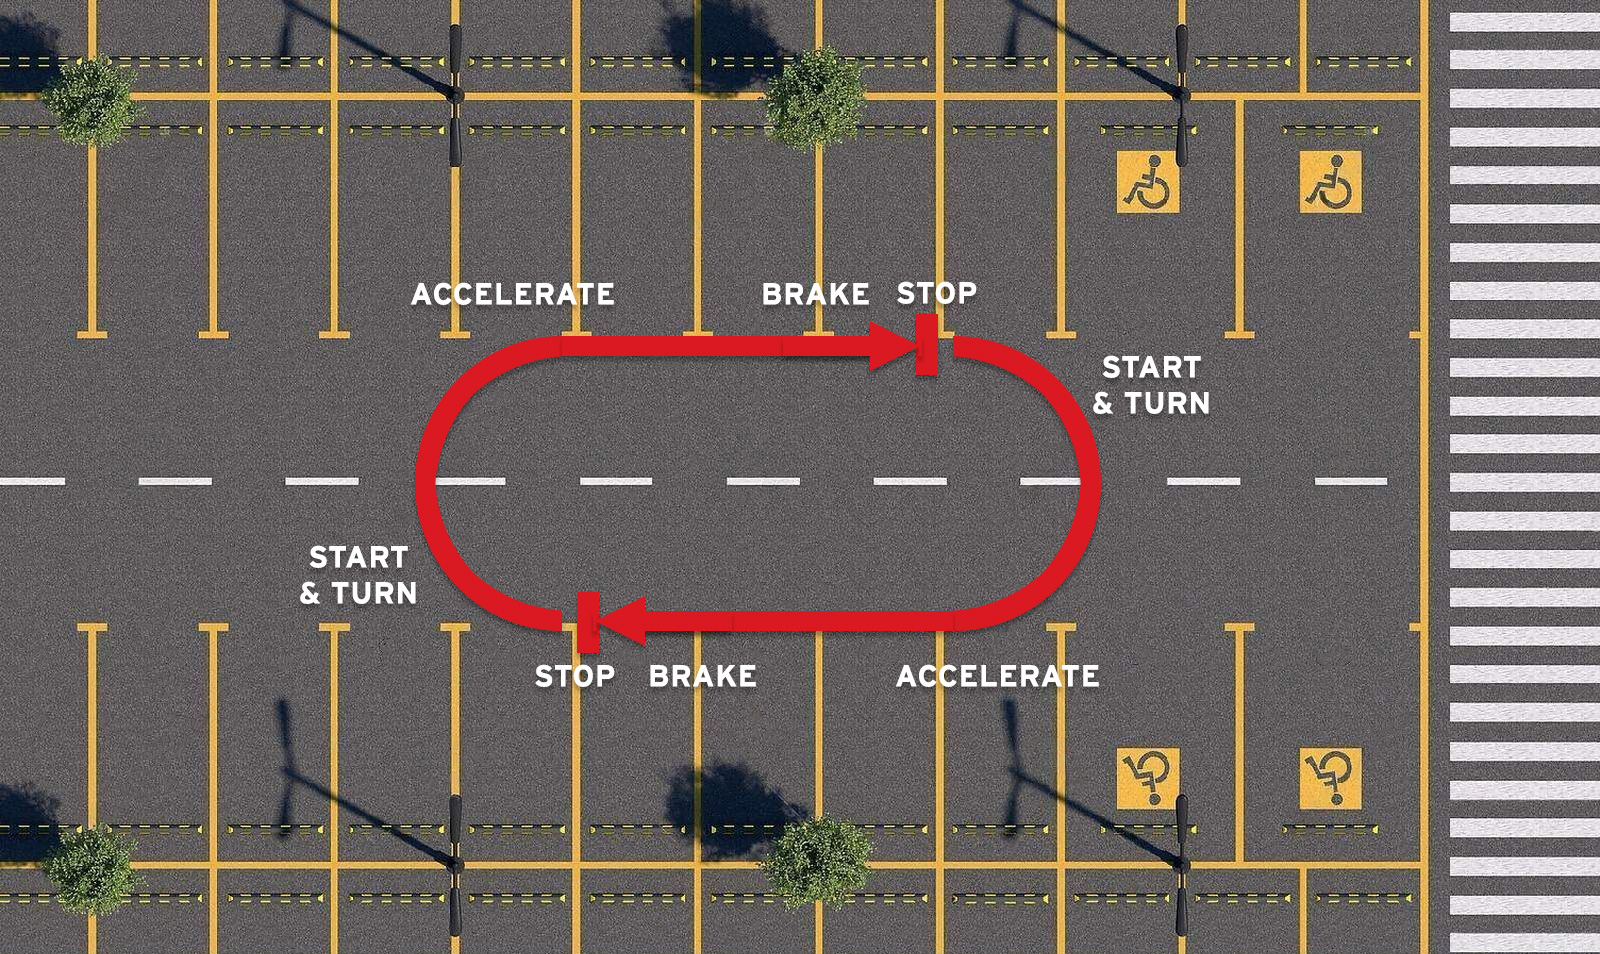
Skills Course Maneuvers
The on-bike portion typically takes place in a closed, marked course — often a parking lot with cones. Standard exercises include:
- Slow-speed straight line: Ride between two parallel lines without putting a foot down or crossing the boundary.
- U-turn or tight figure-eight: Execute a controlled turn within a marked box. This is where most candidates lose points — slow down, look through the turn, and use the friction zone of the clutch.
- Quick stop (emergency braking): Accelerate to a target speed (usually 15–20 mph) and stop as quickly as possible within a marked zone without skidding or swerving.
- Cone weave: Weave through a line of evenly spaced cones using smooth, rhythmic inputs.
- Obstacle swerve: Accelerate and then swerve around a simulated obstacle, demonstrating hazard avoidance rather than braking.
Step 4: Master the Low-Speed Control Fundamentals
Low-speed maneuvers are the great equalizer. Riders who are perfectly comfortable on open roads often struggle when asked to perform a tight U-turn in a 20-foot box. The secret lies in three coordinated inputs:
- Friction zone control: Slip the clutch just above the engagement point to modulate speed without stalling.
- Rear brake drag: Apply gentle, steady pressure to the rear brake while using the clutch to maintain forward momentum. This creates a stabilizing tension in the drivetrain.
- Head and eyes: Look where you want to go — not down at the cones. Turn your head aggressively through the apex of every turn. Your body and bike will follow.
Practice these three elements together until they feel automatic. If you can ride at walking pace in a straight line and execute a smooth U-turn on command, you'll handle anything the course throws at you.
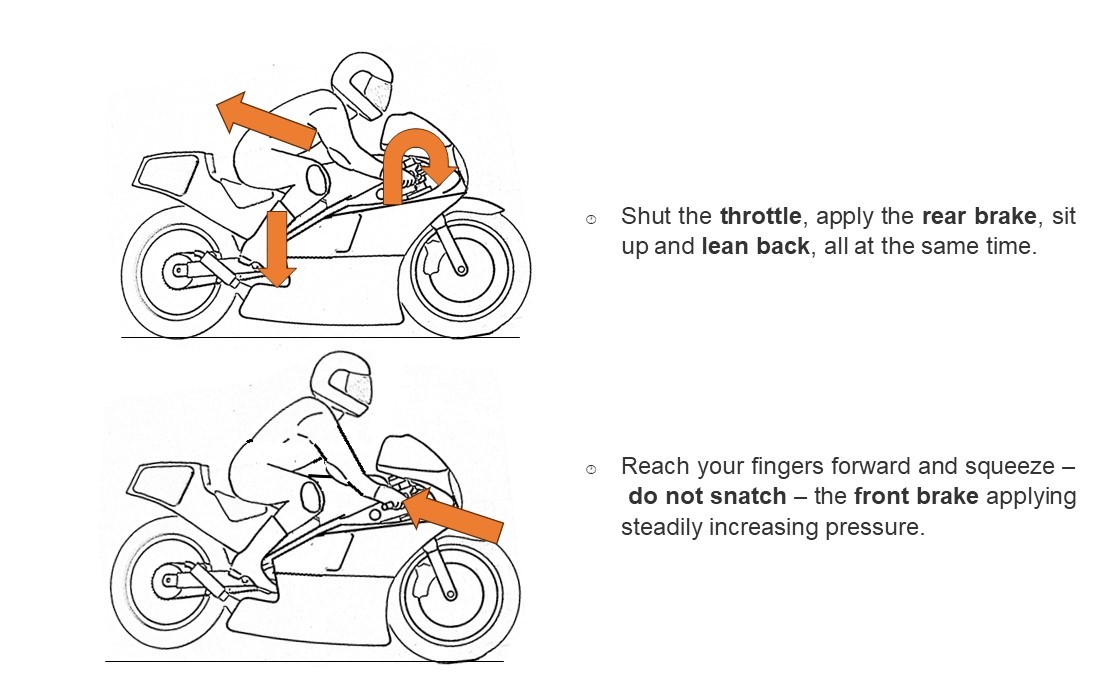
Step 5: Nail the Emergency Stop
The quick stop exercise catches many candidates off guard because it requires doing something counterintuitive: braking hard and decisively on a motorcycle. Apply both brakes simultaneously, weighting the front brake progressively as your weight shifts forward. Avoid locking the rear wheel — a skid is an automatic point deduction in most states. Practice on a safe, empty stretch of road until you can consistently stop from 20 mph within a short, controlled distance.
Step 6: Day-of Test Strategies
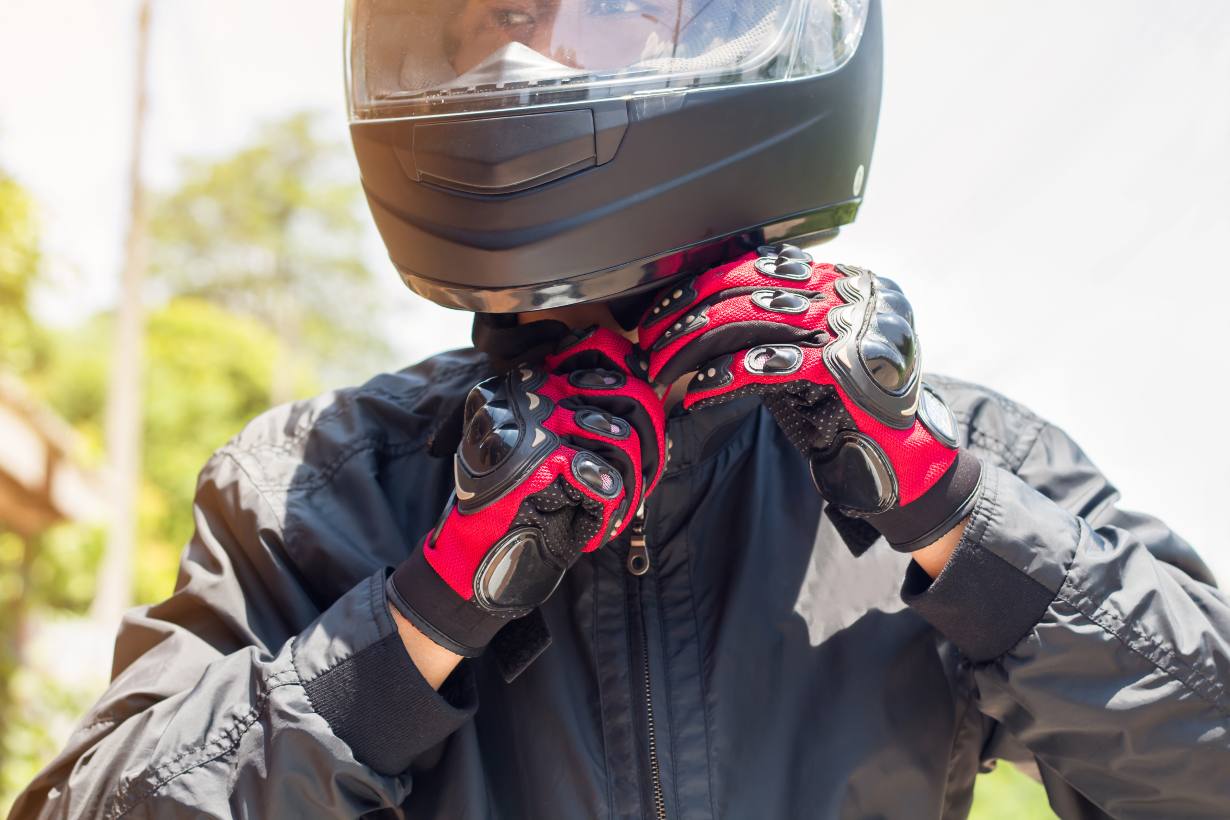
Your mental state on test day is as important as your physical skills. Arrive early, walk the course before your test if permitted, and note where the cones are placed. Wear full protective gear — helmet, gloves, jacket, and boots. Some states require it; all examiners respect it. Take a few slow practice passes in the parking lot to warm up your hands and calibrate your friction zone on that particular bike in those particular conditions. When you're riding the test, breathe, look ahead, and trust the hours of practice you've put in.
Common Reasons Candidates Fail
- Putting a foot down during low-speed maneuvers
- Knocking over cones during the weave or U-turn
- Failing to stop within the marked zone on the emergency stop
- Skipping or rushing through the pre-ride inspection
- Looking down instead of through turns
- Stalling the engine from poor clutch control
What Happens If You Don't Pass?
Don't panic. Most states allow you to retest after a short waiting period — often one to seven days. Use the feedback from your examiner to identify the specific weakness and dedicate focused practice to that single maneuver. Many skilled, experienced riders have needed more than one attempt, particularly when testing on unfamiliar motorcycles or in stressful conditions. Treat a failed test as a paid lesson, not a verdict on your abilities.
Final Thoughts
The DMV motorcycle road test is entirely passable on the first attempt with deliberate, structured preparation. Learn the T-CLOCS inspection cold, practice your low-speed friction zone control daily, and build confidence in your emergency stop. Understand the scoring criteria for your specific state, show up prepared, and ride with the focused calm of someone who has done it a hundred times in practice. Because if you've prepared correctly, you have.